Pro Tips For Your Own Newborn Photography at Home
Guest post by Om Mama Collective member, Jennifer Loomis! Jennifer is an artistic photographer empowering pregnant women through photography for 20 years, specializing in larger families and large image installations. Om Mama Members get exclusive deals when working any of our curated list of business owners. Learn more about Jennifer here!
…
Just had your baby and can’t motivate to get newborn photography? I get it. When I had my baby four years ago, I couldn’t get out of the house and into my own studio (!) until he was four weeks old! As a photographer, this is pretty shameful! But I was just sooooo exhausted. Taking a shower seemed like a major feat. I still wanted images so I took them at home. Here are some professional tips so you can make good images of your little one without leaving your own home. Do it, because they grow up so fast!
Newborn Photography Pro Tip 1- Clothing … or not
Keep it simple, like a white onesie, or get him naked.

Newborn Photography Pro Tip 2- Use only indirect Window light
There is nothing more beautiful than indirect window light. By this I mean, the sun isn’t shining directly in the window. You want your baby to be side-lit (the window is to your side, and to the baby’s side) or front lit (the window is behind you) not backlit (the window is behind the baby, or in front of you).
Newborn Photography Pro Tip – 3 Find a good time of day when your baby is happy
For Mo, it was right after his nap, or after he ate, usually in the morning.
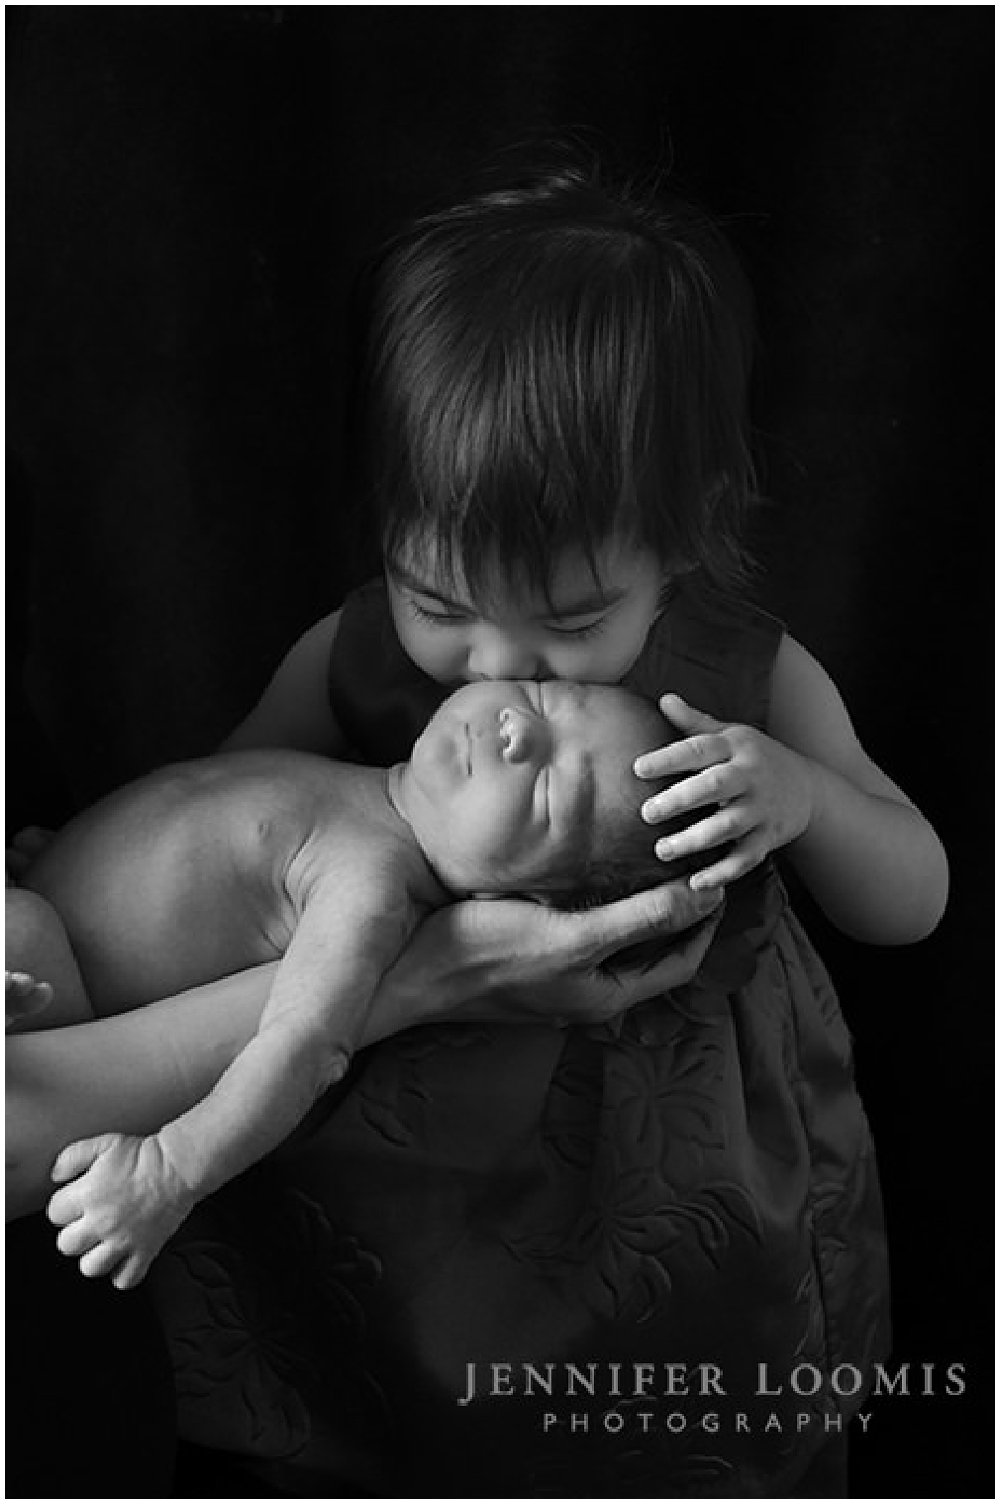
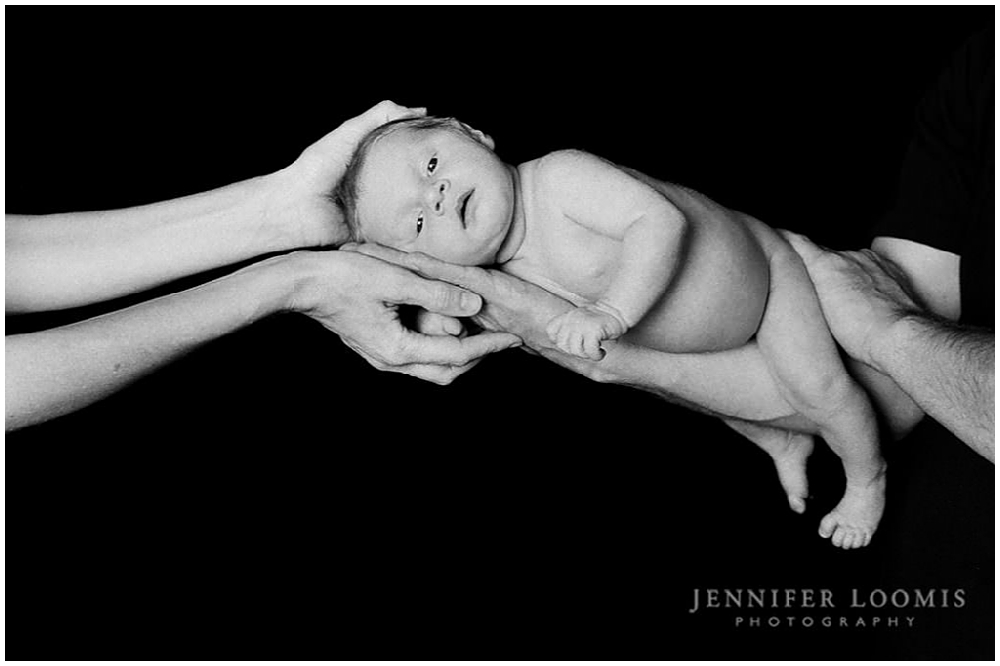
Newborn Photography Pro Tip 4 – Create a mini Studio
Buy a 2 or 3-yard piece of black velvet. Wash and dry it. Then set a chair or an ottoman perpendicular to a window (so if you were sitting on the chair or ottoman, the window would be next to your arms). Drape the velvet over the chair and onto the floor. Then put the baby down on the floor and prop him up with a soft pillow, or a breastfeeding pillow works great. You can then really have some fun. Try to get that little tiny one to smile, by ticking their lip. OR have your partner hold the baby in his hand (see image above).
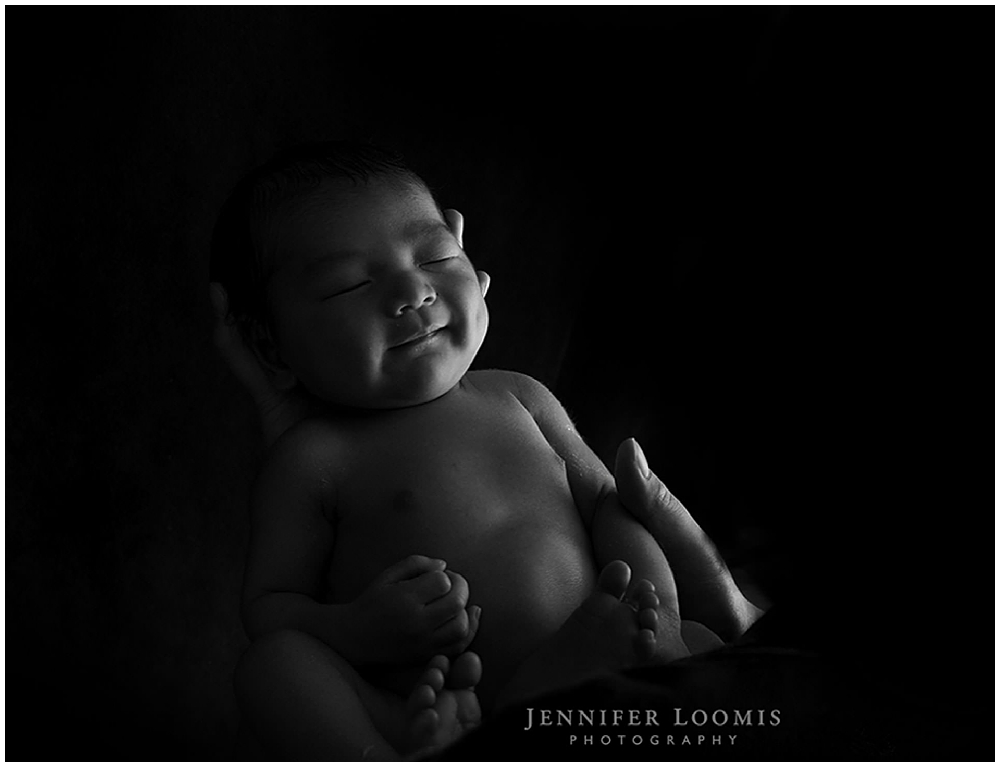
Newborn Photography Pro Tip 5 – Lift the baby’s front up on a breastfeeding pillow
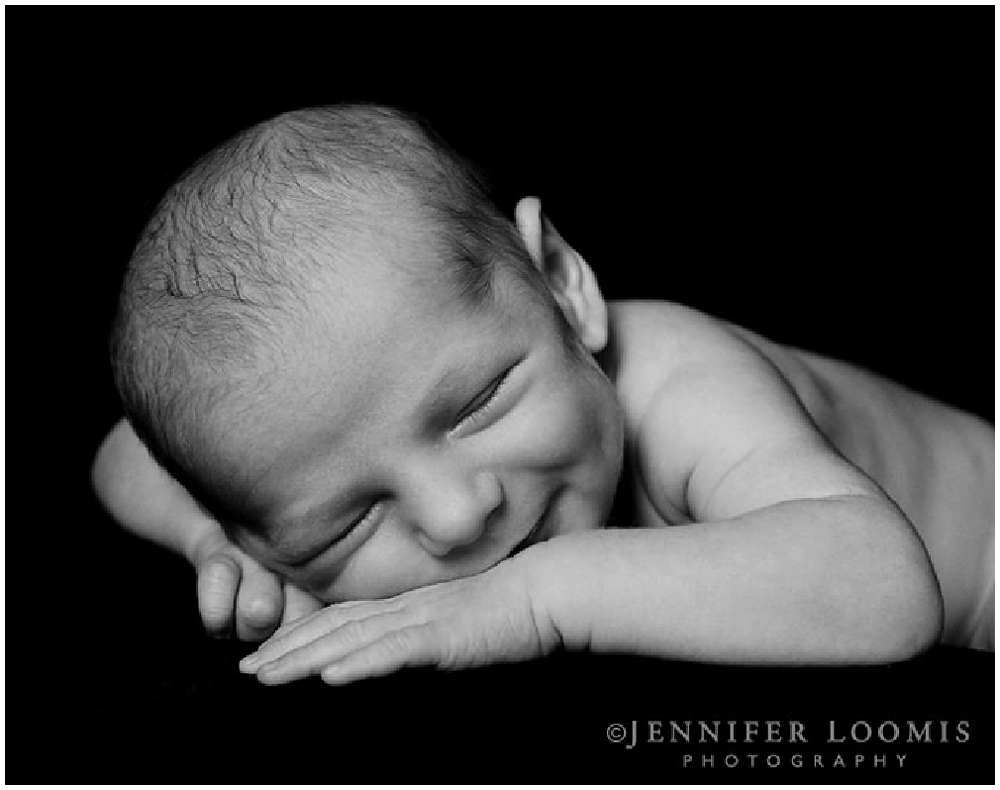
Take your breastfeeding pillow and put it under the black velvet. Then place the baby on their stomach, but drape the chest and arms over the pillow. This will lift up their front half a little bit so you can get more of their face. I like breastfeeding pillows because they seem to have the right curve to support the baby. Feel free to position their arms so that you can see their face. In the image below the little guy was sleeping. We propped him up on a small sofa cushion, so we could move his hands around. He naturally smiled in his sleep which was magical.
Newborn Photography Pro Tip 6 – Have your partner hold the baby. Ask for help from siblings
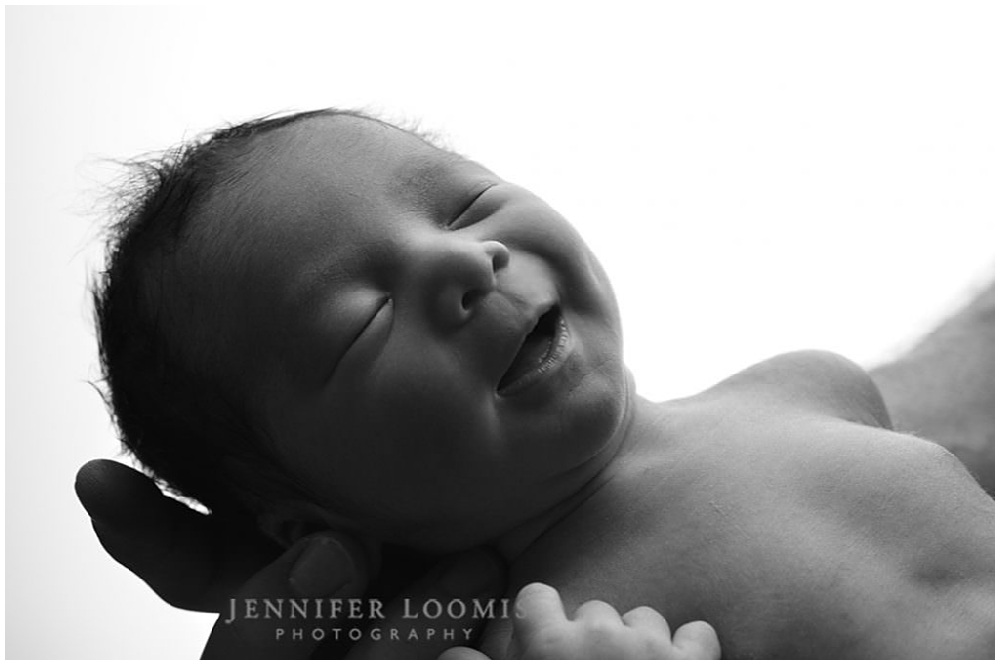
Notice the window. I am very close to the window in the top photo (white background) and the window is right behind me in the bottom photo (black background).
If you have other siblings, this is something to consider trying too. Again, where is the light coming from? Look for the shadows and they will tell you. The window is off to the left.
Newborn Photography Pro Tip 7 – Get creative
This was my favorite newborn image from my session with my son. Yep. That is me. Please don’t try this without having a bunch of people around to spot the newborn. I had a photographer help take the image, and an assistant just off camera ready to catch the baby.
![]()
Leave a Reply